The adoption rate of HTTPS for websites is increasing exponentially and part of the reason is how easy it is to set up. Gone are the days of expert knowledge of root certificates, server versions, IIS mastery and other black magic. Today there are services that let you set it all up in as little as 4 minutes and 38 seconds (I timed it). This article outlines the basic steps I used and was first published on gooroo.io.
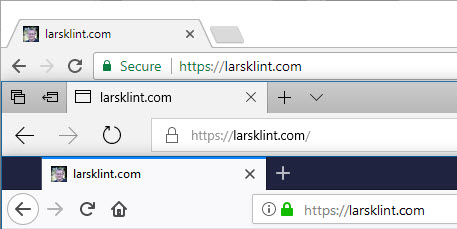
Most people are familiar with HTTPS and the concept of secure websites. Securing websites become more and more common, which is a really good thing. Not only do we know that the data sent and received from the website is secure, but we also get a sense of knowing we will be alright. We expect that we get confidentiality, authenticity and integrity from modern websites. After all, we see sites every day with this:

This is becoming more and more common, and according to Scott Helme almost 31% of the top 1 million websites is now using https only. We want websites to be on https, or TLS as it is technically called, because it brings only benefits to users. Traditionally this has been a very arduous and expensive exercise to achieve https on a standard website, but those days are past. You can use services like Let’s Encrypt to get a free automated (it renews itself and other feature) certificate for any website. The process is simple, but not the aim of this article.
Another invaluable service is Cloudflare. It is a company that provides a content delivery network, DDoS mitigation, Internet security services and distributed domain name server services. In other words, CloudFlare makes your website perform and function like a large enterprise site. For free. Among other things, CloudFlare can also set up HTTPS for you with a few clicks. One of the things that most people aren’t aware of is HTTP Strict Transport Security or HSTS. It is a web security policy mechanism which helps to protect websites against protocol downgrade attacks and cookie hijacking. HSTS protects you against people requesting your site insecurely, whether for malicious purposes or not.

In the screenshot above I have requested my website via HTTP, hence insercurely, and is immediately redirected to HTTPS. As you see from the headers, there is a strict-transport-security that handles the redirect. Also note the “preload” value, which we will get back to shortly.
The way I set this up in CloudFlare was super simple. Go to your Crypto settings and scroll down to HSTS.

Then click the HSTS settings button, agree to the warnings about HSTS (no one can access your site over http from now on) and you get the actual settings for HSTS.

Set all to “On” and max age header has to be 12 months for the next step to work. What you now have it CloudFlare adding the appropriate headers to your website to enable HSTS.
We still have one issue though. The first time someone requests your website, they can do so insecurely. To avoid that scenario, we have the “preload” value I mentioned above. This value lets you submit your website to the HSTS preload project to inclusion in the various web browser executables. When users request your site, the browser will know it is HSTS compliant and never request it insecurely over the web. Instead it will issue a HTTP status code 307 to immediately redirect and request it via HTTPS.
To enable this, go to https://hstspreload.org/ and submit your website. If you have set it up correctly in CloudFlare, you will see something like below.

In a future version of the various browsers your site will now be included as a preloaded site. And your website is now conforming to best practices on the web and giving your users a better experience.
I recently released a Pluralsight course on HTTPS with Troy Hunt, which is definitely worth a watch if you are a developer or in that space.

