:::: MENU ::::

Installing Starlink with Dual WAN on the UDM Pro

I finally got Starlink! Yes, the revolutionary Internet service from SpaceX has arrived at the farm. I have been using a Skymuster Plus connection for about 4 years, which is a service provided by the Australian government through retailers. While it isn’t terrible, it definitely isn’t amazing. The ping of 600ms kills a lot of apps, I talk over people on video calls, I always wait for things to load or happen etc. I got used to it, but never should have.

In a nutshell, Starlink operates through a super constellation of satellites in low earth orbit. Because they are only 350-550km up, the ping for the service is very low, but they are not stationary. Each satellite connects to a ground station that connects the user (me) to the Internet.

Getting Starlink meant I had to make a few choices though:

  • Determine the optimal installation point for “Dishy”, the user terminal, on my roof (or other place).
  • Either discontinue my current ISP connection, or use it as a backup

Finding the optimal place for Dishy is a lot of trial and error. The main problem I have is trees blocking the view of the sky, thus the connection to satellites. Luckily the Starlink app provides a feature to scan your preferred installation point and tell you if it’ll work or not.

Second, I decided to use my existing internet connection as a backup, or failover, for Starlink. Because Starlink is still in beta, I am not sure I 100% trust it just yet. Having another connection to fall back on could be very beneficial. It turned out that the UDM Pro supports dual WAN natively, and I went down that path. It didn’t quite go to plan though. Check out the video below for the full story.


10 Tips for Getting Started With Home Automation

I have been dabbling a lot with home automation in many areas over the past 18 months. I have automated lights to come on a certain times or for certain events, installed water tank level monitoring, set up temperature sensors all over the place, integrated local weather with alerts, used motion sensors to monitor our gate and much more. Over that time I have learnt a ton. Some of it I wish I knew before I started, so I thought I’d help out anyone else just starting out with home automation. There are 10 tips, which I think are important to consider or carry out to get the right start. I put them all together in this little video. Enjoy 😁


YubiKey – How Does It Work?

Have you ever wondered just how a USB security works? Yeah, I did too for the longest time. I just couldn’t get my head around why it was more secure, more convenient, or just better than other multifactor authentication options. So, Yubico sent me two YubiKeys to test out, and I made a video out of it, which is below.

TL;DR: USB security keys are harder to compromise than authenticator tokens (in an app), and easier to use as you just touch them when inserted. Anyway, find out more in the video 😊


What is Unifi Access? – Complete Overview

I installed Unifi Access some months ago, both to add some security but also because swipe cards. Why would I not want that on my office? Anyway, Unifi Access does a whole bunch of things, some of which I don’t use with a single door lock, but also some that I keep getting questions about. So, as an add-on to my first installation video I thought I’d do a full run-through of what you can do with Access. Enjoy.


IT Support over 14,500km – Remote Installing Amplifi Alien Network

As most IT nerds are destined to do, I also support my family (which means I mostly fix their printers). I thought I would do some more in-depth support and organised for an Amplifi Alien system to be sent to my brother in Denmark. He is not a technical person beyond using a phone and hooking up a home stereo, so it was an interesting experiment to see how easy Amplifi is to set up.

Check out the video for some multi-angle remote IT support from 14,500km away.


Monitoring Water Tank Levels With Home Assistant

I have been getting into Home Assistant for automating and optimising the infrastructure on my farm for about a year now. One of that main reasons to initially investigate how to do this, was to monitor my water tanks. I have no town water connected, so I rely on rain water tanks and a bore/well for backup. Living in country Australia, it is east to suddenly use way more water than you think due to washing, pool filling, garden watering, leaks and much more.

The tanks are dispersed on the property, so checking them manually requires lots of walking, climbing, lifting and finagling. Having sensors showing levels, remote on/off for pumps and logic to automate it would save time, money and water. It took quite a while to figure out which solution to implement, but I ended up with pressure sensors/conducers to get a water pressure reading, then convert that to litres using mathematics. It was quite a journey, and the hardest to figure out was the house tank, as it is an in-ground tank. Measuring pressure at the bottom of it is tricky.

In any case, I documented the whole journey in the video below. Hope you find it helpful and leave a comment if you have a comment or question. 😊


A full walkthrough of my Ubiquiti Farm WiFi

For the past year I have been upgrading, expanding, testing, configuring, adding and breaking my farm WiFi setup. I have been using Ubiquiti equipment, mainly from their Unifi range, and it has changed how I work, how I play and how I use my network day to day. It has upgraded my professional work with better lighting, more stable connection and removed one uncertain element of country living. For me and my family it has genuinely changed our ability to communicate with family overseas, our local community, our volunteer projects and schools. Most importantly, it has increased the safety of working on the farm outside, as we have no, or very limited, mobile signal. We can now call and communicate in general almost anywhere on the farm (and get those important tweets out!)

When I first started changing my WiFi devices it was to get rid of repeater points mainly, but I also had a bunch of other reasons. I didn’t expect it to have this much of an impact, nor that I would enjoy nerding out over networking equipment that much. But I have.

So far I have covered roughly 30 acres (12 hectares) in stable WiFi, built Llamacam and installed swipe card access to my office, which is made possible by the following gear:

That is a massive list, when I see it like that. It has been a very incremental journey, so it kinda blows my mind to see where I am at now. And because of that, I made this video to give you the tour of the farm and how it is all connected. Enjoy.


Aqara Door Sensor, Govee LED Strip and Home Assistant Automation

I am getting into home automation big time. I am loving the learning process, the tangible result and nerding with all sorts of processes. Most of it involves networking components, programming, new gadgets and an improvement of my every day life. All things I value very much.

In general I am looking for one or more of two principles when I install IoT devices or home automation

  • Save me energy, time or money. There should be a measurable saving somehow that justifies the often many hours of work.
  • Add a function or feature I am missing and would use regularly.

As tempting as it is sometimes to install something “just for fun”, it is most likely a waste of time. This time I needed lights in my server cupboard (which is just a cupboard that I happen to put the server cabinet in) and I figured I could automate it with Home Assistant and automation. I used a Govee Light Strip, an Aqara door sensor and community integrations in Home Assistant to get it all happening. Check out the video below.


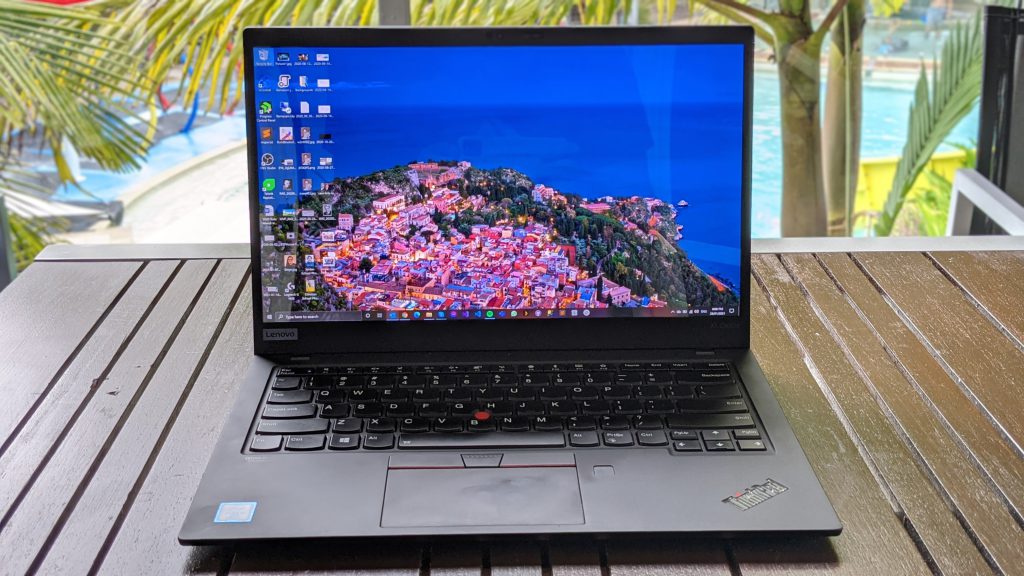
A Year with the Lenovo ThinkPad X1 Carbon Gen 7

Disclaimer: I am part of the Lenovo INsiders program, which provided the X1 Carbon for this article.

I have been using Lenovo laptops for years for multiple reasons. They are reliable, durable, modern, innovative and well spec’d. Of course, there are exceptions (I am looking at you Ideapad 100), but I love them and they suit my world.

In December 2019, I got my hands on the 7th generation of the ThinkPad X1 Carbon laptop. This was, at the time, the premium Ultrabook in the X1 line, and I was giddy as a llama in a heap of freshly cut tree branches. It was an exciting moment, and I was over the moon. However, after a full year of using the machine every day, how does it hold up? Read on to find out.

X1 Carbon Gen 7

Continue Reading


Pages:1234567...16